Saturday, December 27, 2014

Cold Weather Adaptation

The next couple of weeks are predicted to be too cold for epoxy to set in my unheated shop.  I am into a series of little dabs here and there, and it would be so handy to keep working a few hours at a time.

Here is my solution.

Today, I took the epoxy from the nice, warm house, out to the shop where I mixed up a few batches with lots of structural filler.  I filled the gaps between the wire stitches on the outside of the hull.


I bent all the wire stitches to stand straight up.


Then I parked a heater beneath the boat.


And covered everything with a tarp!


I have a thermometer under the boat and will check the temperature in a few hours.  I love doing these projects that encourage creative thinking.


Tuesday, December 23, 2014

Humphrey

Saturday, Alan came over for a look at the final hull shape.  The stitching was done, cinching everything into shape.  We discussed the built-in buoyancy and agreed that the two level tanks will be a great way to go, providing copious amounts of emergency floatation as well as comfortable seating, bow and stern.

Later that day, I went back out to the shop and mixed up epoxy with structural filler.  Filled in the spaces between the stitches.  I work Sundays, so that would give the epoxy time to set before I was free again.


Yesterday afternoon, my son came by and helped me roll the hull over, so I could work on the exterior.  His wonderful artist/engineer's eye noticed some bulges in the bottom panel!  I was aghast!  At a loss for a way to correct them.  Logan pointed out that some of the panels may be slightly too wide.  Of course.  Brilliant.  Just run the saw down the joints to cut back the panels.

This morning, I returned to the shop.  Pulled a few stitches and cut through the epoxy fillers with the jig saw.  Took a few cuts to remove enough material, but I am so relieved to see that he was right!  

I expect, when I tell Logan he saw, then solved the problem in the blink of an eye, that he will react much like Sheldon on Big Bang Theory.  "Of course."

I never took any pictures of the hull before the corrections, but I am more than pleased to post a few 'afters'


I just published this entry and reread the title.  I thought I would explain it, but no.  If you don't get it. let me know in the comments.

Merry Christmas,  Gerry

Saturday, December 20, 2014

Panel Stitching is Complete

The next stages in the building are complete!

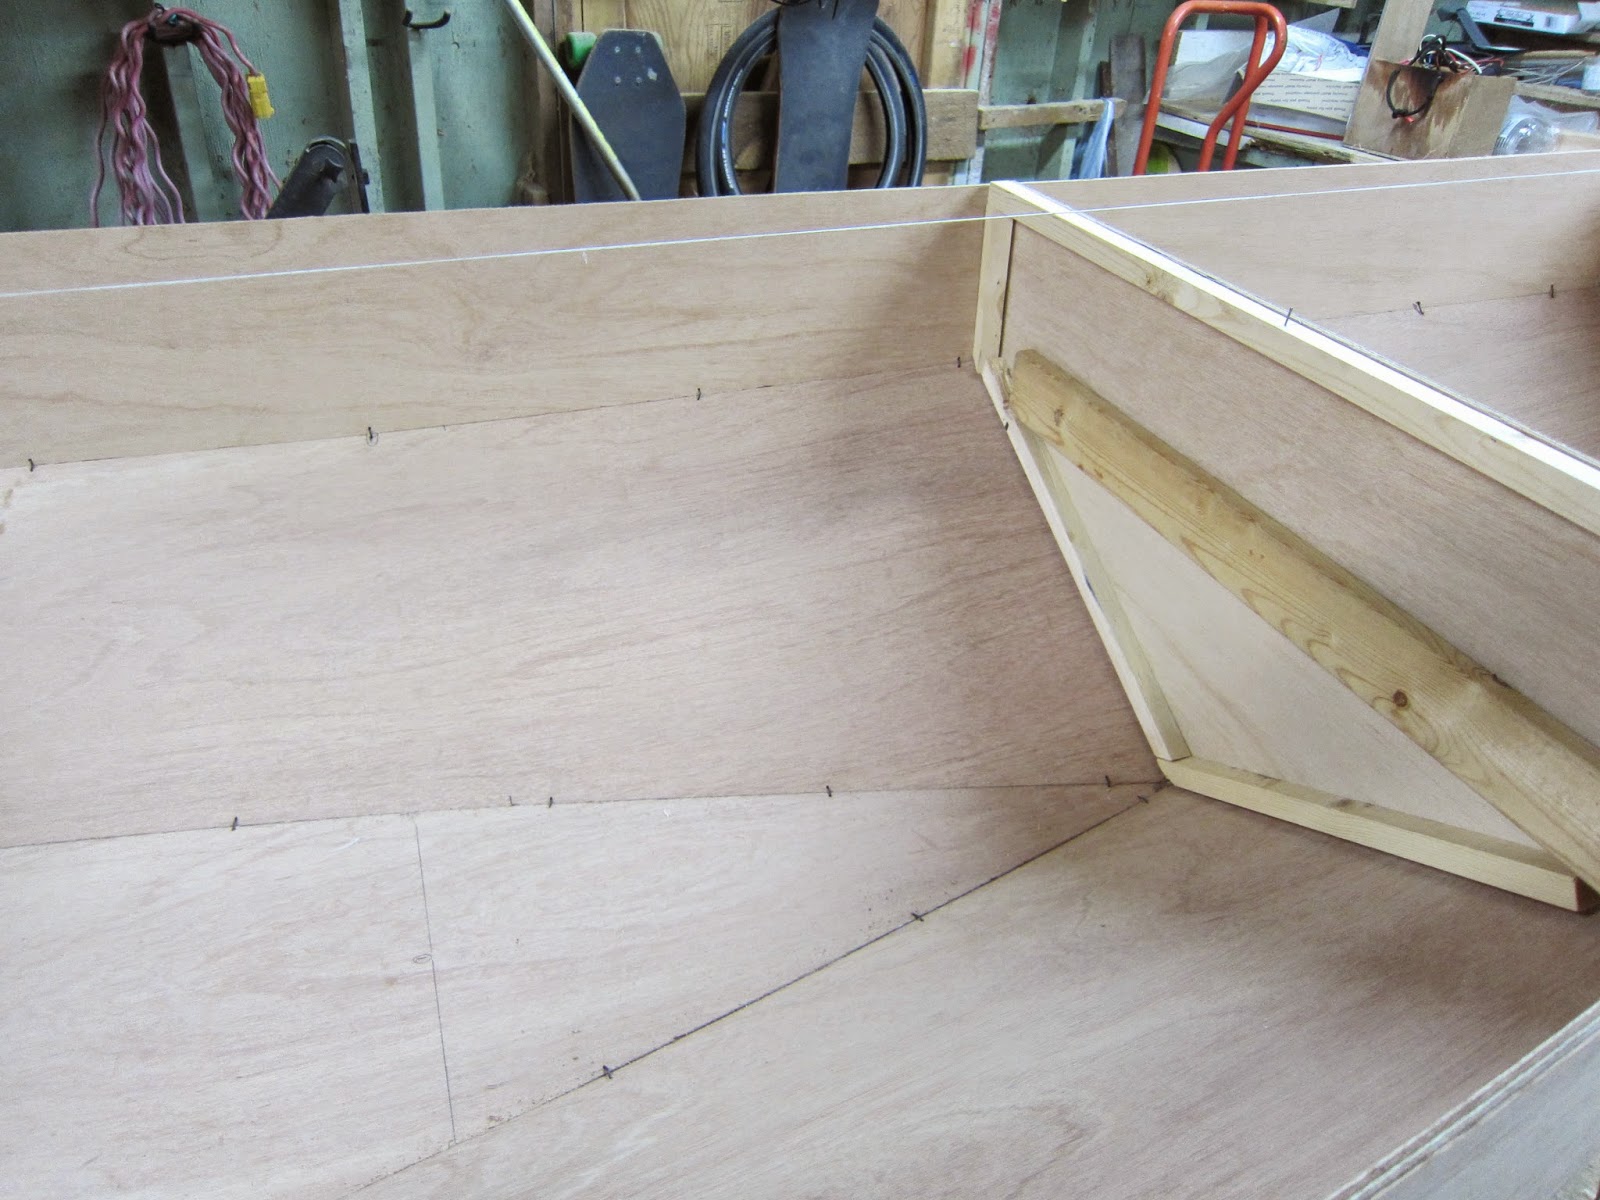
I hung some slings from the rafters in my shop and used them to hold the bilge panels in place.  I then slid the bottom panel into place and began attaching the panels to the transom and to each other.

Not much to tell here.  Shall let the photos show what I have done.

I have also been investigating buoyancy for the boat as the design doesn't call for any.

I wrote a note to Jim Michalak for advice and he has yet to answer.  I visited small boat building sites and discovered it is not difficult to design my own.  So, here is what I have calculated.  Roughly.

There are bulkheads four feet from each end of the boat.  If I close off both of them, from the bottom of the boat to the transom, that would provide an astounding 704lbs of reserve buoyancy to the boat!

If I were to make the front and the rear buoyancy compartments only platforms that go from the floor of the boat to the chine, that would provide only 204lbs of reserve buoyancy to the boat.

If I were to make the compartments low, like a sitting platform, for half of each area and the part closest to the end go all the way to the deck level of the boat, those volumes would provide a respectable 350lbs of reserve buoyancy to the boat.  That amount of reserve would allow the boat, if swamped, to ride high enough in the water to support a person's weight while bailing out the boat.

Whether the hull shape would be stable enough to keep from rolling over is beyond me until I get it in the water, but I do know the boat will have plenty of emergency buoyancy plus a seat for a passenger in the stern, plus a seat for the rower at the front, when the passenger's weight needs the rower to move forward to balance.

Next stage is to mix up some epoxy and start gluing the boat together.

On with the picture show!


Monday, December 15, 2014

Going 3-D

The last 9 days have seen some progress in the building of this Oracle. We have had mild weather to help the epoxy harden.  The warm days have encouraged long hours drawing and cutting out the five panels that make up the boat.  Two side panels.  Two bilge panels and the bottom of the boat too.

Once the panels had been cut out, they were turned over and the seam between the plywood sheets was coated with epoxy and fiberglass cloth.

The boat is given its shape by the interior bulkheads. Those bulkheads were drawn, cut out and edged with strips of wood to act as stiffeners and to hold screws necessary to keep the side panels in place

Today I took the gluing table apart and left the two saw horses to hold the bottom of the hull. The tops of the saw horses are level and parallel.  I was able to attach the two side panels to the interior bulkheads with drywall screws.


Saturday, December 6, 2014

Finally Underway!

A new boat design has been chosen.  I am going to build Jim Michalak's Oracle!

Two weeks ago, I ordered the plans through Duckworks and they arrived yesterday.  A week ago, I ordered the marine plywood from our local Windsor Plywood and was happy to have that arrive Thursday.  The last sunny day in the forecast!

I was so excited to open the boat plans!  The entire plan, with all the drawings, is on one large sheet!  Instructions and useful information on a dozen or so printed pages.


I've had Jim Michalak's boat building book from the library for a few days and have read through that too.  Everything seems to make sense.

Late afternoon, I went out to the boatshed, and armed with a forecast for very mild temperatures, I began the project.  Officially Began!

The beginning steps have me epoxying two sheets of plywood together, end to end.  Epoxy bonding a strip of fibreglass to that joint.  The epoxy and cloth went on nicely as I've been keeping the epoxy warm, inside the house.  To help the epoxy cure, I built a little tunnel and heated it overnight.  This morning, most of the joint is nearly ready.  I moved the tent and heater and expect the last tacky section to be set by lunchtime.

Once the epoxy is cured, I can draw on the panels for the sides and bottom.

So exciting!